2. The Line Tool
The Line tool works by
letting you touch the screen in one spot and drag to another, creating a
line between the two spots when you let go. While you're dragging, a
temporary line is drawn between the two points.
Make a new NSObject subclass named LineTool in your Xcode project. Both the header and implementation files are shown here:
//  LineTool.h
#import <Foundation/Foundation.h>
#import "Tool.h"
@interface LineTool : NSObject <Tool> {
  id <ToolDelegate> delegate;
  NSMutableArray *trackingTouches;
  NSMutableArray *startPoints;
}
+ (LineTool *)sharedLineTool;
@end

//  LineTool.m
#import "LineTool.h"
#import "PathDrawingInfo.h"
#import "SynthesizeSingleton.h"

@implementation LineTool
@synthesize delegate;
SYNTHESIZE_SINGLETON_FOR_CLASS(LineTool);
- init {
  if ((self = [super init])) {
    trackingTouches = [[NSMutableArray array] retain];
    startPoints = [[NSMutableArray array] retain];
  }
  return self;
}
- (void)activate {
}
- (void)deactivate {
  [trackingTouches removeAllObjects];
  [startPoints removeAllObjects];
}
- (void)touchesBegan:(NSSet *)touches withEvent:(UIEvent *)event {
  UIView *touchedView = [delegate viewForUseWithTool:self];
  for (UITouch *touch in [event allTouches]) {
    // remember the touch, and its original start point, for future
    [trackingTouches addObject:touch];
    CGPoint location = [touch locationInView:touchedView];
    [startPoints addObject:[NSValue valueWithCGPoint:location]];
  }
}
- (void)touchesCancelled:(NSSet *)touches withEvent:(UIEvent *)event {}
- (void)touchesEnded:(NSSet *)touches withEvent:(UIEvent *)event {
  UIView *touchedView = [delegate viewForUseWithTool:self];
  for (UITouch *touch in [event allTouches]) {
    // make a line from the start point to the current point
    NSUInteger touchIndex = [trackingTouches indexOfObject:touch];
    // only if we actually remember the start of this touch...
    if (touchIndex != NSNotFound) {
      CGPoint startPoint = [[startPoints objectAtIndex:touchIndex] CGPointValue];
      CGPoint endPoint = [touch locationInView:touchedView];
      UIBezierPath *path = [UIBezierPath bezierPath];
      [path moveToPoint:startPoint];
      [path addLineToPoint:endPoint];
      PathDrawingInfo *info = [PathDrawingInfo pathDrawingInfoWithPath:path fillColor:delegate.fillColor strokeColor:delegate.strokeColor];
      [delegate addDrawable:info];
      [trackingTouches removeObjectAtIndex:touchIndex];
      [startPoints removeObjectAtIndex:touchIndex];
    }
  }
}
- (void)touchesMoved:(NSSet *)touches withEvent:(UIEvent *)event {}
- (void)drawTemporary {
  UIView *touchedView = [delegate viewForUseWithTool:self];
  for (int i = 0; i<[trackingTouches count]; i++) {
    UITouch *touch = [trackingTouches objectAtIndex:i];
    CGPoint startPoint = [[startPoints objectAtIndex:i] CGPointValue];
    CGPoint endPoint = [touch locationInView:touchedView];
    UIBezierPath *path = [UIBezierPath bezierPath];
[path moveToPoint:startPoint];
    [path addLineToPoint:endPoint];
    [delegate.strokeColor setStroke];
    [path stroke];
  }
}
- (void)dealloc {
  [trackingTouches release];
  [startPoints release];
  self.delegate = nil;
  [super dealloc];
}
@end
This is pretty similar to the
Pencil tool. We keep track of all the current touches, as well as the
start point for each of them, so that we can make a proper line path for
each line segment. We use the touchesBegan:withEvent: method to save a reference to each touch we're tracking, as well as each start point. Then in touchesEnded:withEvent:, we create a new path object and send it to the delegate.
Now we need to add a bit to DudelViewController, so that it knows about this class and can work with it. Start off with another import line, somewhere near the top:
#import "LineTool.h"
Then fill in the touchLineItem: action method, like this:
- (IBAction)touchLineItem:(id)sender {
  self.currentTool = [LineTool sharedLineTool];
  [lineButton setImage:[UIImage imageNamed:@"button_line_selected.png"]];
}
Again, build and run your app,
and try out our new tool. One nice feature of this implementation is
that since you're tracking multiple touch points, you can touch and drag
with several fingers at once, dragging out lines behind each of them.
If you're running on the simulator instead of an actual iPad, you can
test this a little by holding down the Option key while you're clicking,
which simulates an additional click on the other side of the screen.
This is mainly in place to help simulate twist and pinch gestures, but
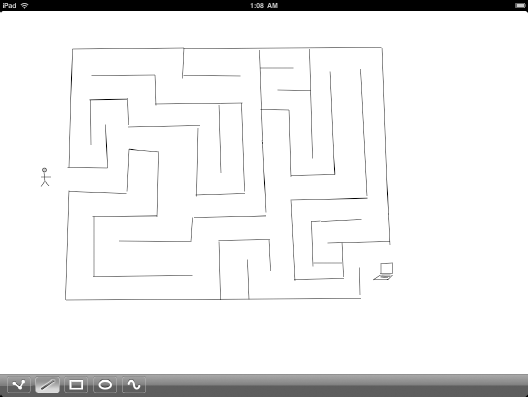
we can use it here as well. Figure 2 shows some lines.
